Décorations de Sapin avec Dentelle
16/11/2023

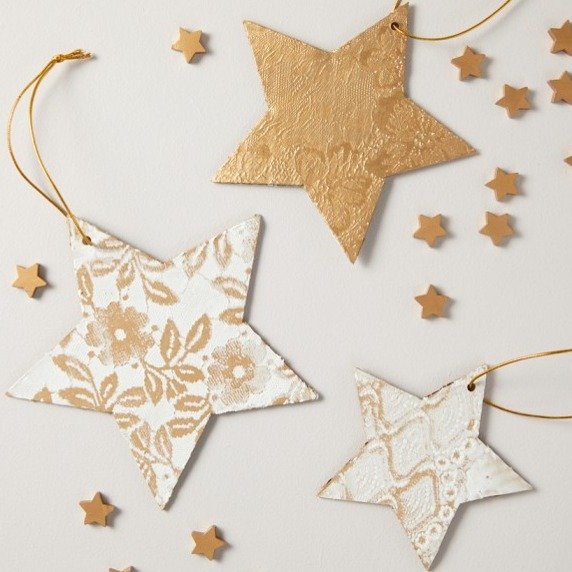
Découvrez comment réaliser des décorations de sapin de Noël exceptionnelles avec de la pâte de modelage. Ce tutoriel DIY vous guide pas à pas pour créer des ornements personnalisés, ajoutant une touche artisanale et festive à votre sapin. Une activité créative idéale pour vivre la magie de Noël en famille.

Matériels :
- Pâte de modelage
- Cire à dorer gédéo
- Pinceau plat
- Tissu en dentelle
- Feuille de carton
- Ciseaux
- Ruban ou ficelle pour accrocher
Niveau de difficulté :
- Temps de séchage : 48 heures
- Temps de réalisation : 5 h
- Difficulté : Difficile - À partir de 10 ans à l’aide d’un adulte

Etape 1 : Préparez le Carton
- Découpez des étoiles de différentes tailles dans les feuilles de carton.
- Utilisez la perforatrice pour faire un trou près du sommet de chaque étoile.
- Découpez des morceaux de tissu en dentelle légèrement plus grands que vos étoiles.
- Collez délicatement la dentelle sur une face de chaque étoile à l'aide de colle.

Etape 2 : Appliquez la Pâte de Modelage
- Modelez la pâte de modelage en petites formes décoratives, comme des fleurs ou des arabesques.
- Collez ces formes sur les étoiles à côté de la dentelle.
- Laissez sécher la pâte de modelage selon les instructions du produit.

Etape 3 : Peignez les Étoiles
- Utilisez une cire à dorer pour ajouter de la couleur à vos étoiles.
- Accentuez les détails et les reliefs créés par la dentelle et la pâte de modelage.

- Passez un fil de pêche dans le trou percé sur chaque étoile.
- Attachez les extrémités des fils pour créer des boucles de suspension.
- Une fois les étoiles sèches, accrochez-les sur votre sapin de Noël.
- Arrangez-les de manière à créer un superbe effet visuel.
Produits Connexes
à lire aussi
@PEBEO Suivre Pébéo sur Instagram
Newsletter
Inscrivez-vous à notre Newsletter et restez informé de nos actualités. Pour en savoir plus sur la gestion de vos données personnelles et pour exercer vos droits, cliquez, ici


